
In this tutorial I want to give you an idea about how we can apply layer effects in an interesting way in photoshop. And also we are going to tell how you can create a reflective effect in photoshop. Also this tutorial will give you an idea how to use the gradient effect and how to balance colors in a logo. I hope you will enjoy it, here we go…
STEP 1
We need to create our project file first and in this tutorial we create a new file (Ctrl+ N) with dimension of 1500x1500px (300dpi).

STEP 2
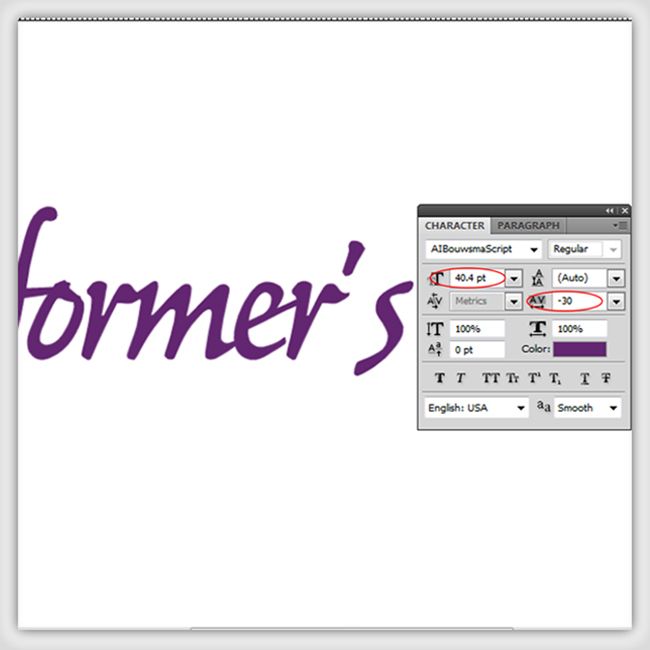
In the tool bar on the left, click on the ‘Horizontal Type Tool’ and type the word Performer’s. Now change your font settings. Font color to ‘#632671’ , ‘AIBouwsmaScript’ for the font, and 40.4pt for the Font Size,. Lastly, open up your Character palette. If it’s not already open, then click Window->Type->Character. Change the Tracking to -30pt. All these settings are suggestions for those who are following along, they may vary for you, if you’ve sized things differently. So use trial and error until things look just right.
STEP 3
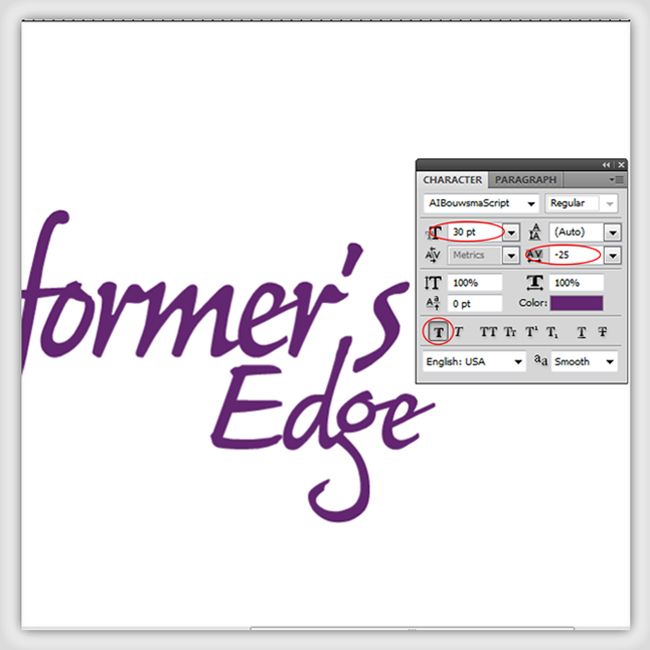
Then take a copy of the above text, ( alt+drag the typed word or select the text layer in the layer pallet and press ‘Ctrl+J’ ) select type tool from the tool box and change the copied text into Edge. Then open up your Character palette again. Change the font size to 30pt, the Tracking to -25pt and activate the ‘Faux Bold’.
STEP 4
Now we are going to the best part in this tutorial, what we have mentioned in the beginning. I am going to give you knowledge about using the layer effects in an effective way.
First we will use effects to the ‘Performer’s’ text. Select the relevant text layer from the layer pallet and right click-> select Blending Options.
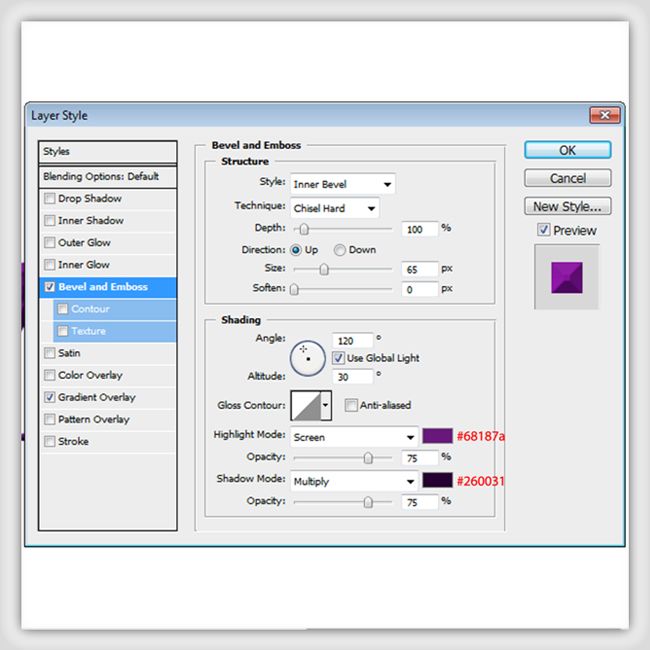
The layer styles for the ‘Performer’s’ text are shown below.
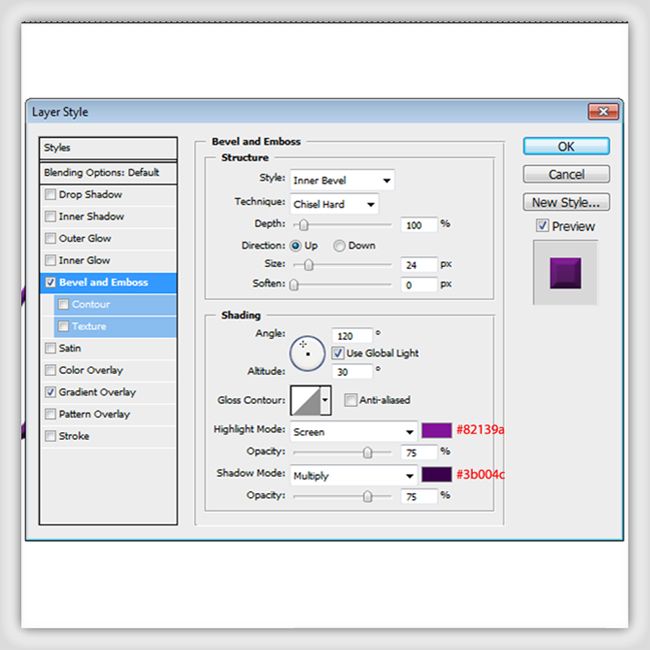
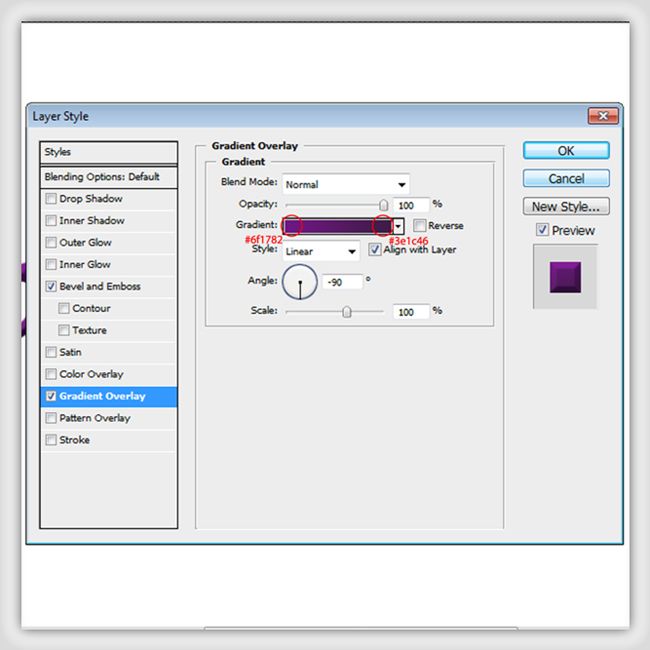
The colors used to apply the gradients are ‘#6f1782’ and ‘#3e1c46’
STEP 5
Now we are going to add layer styles for the other text that means to the Edge text. Follow the same procedure as above and go to the layer style pallet.
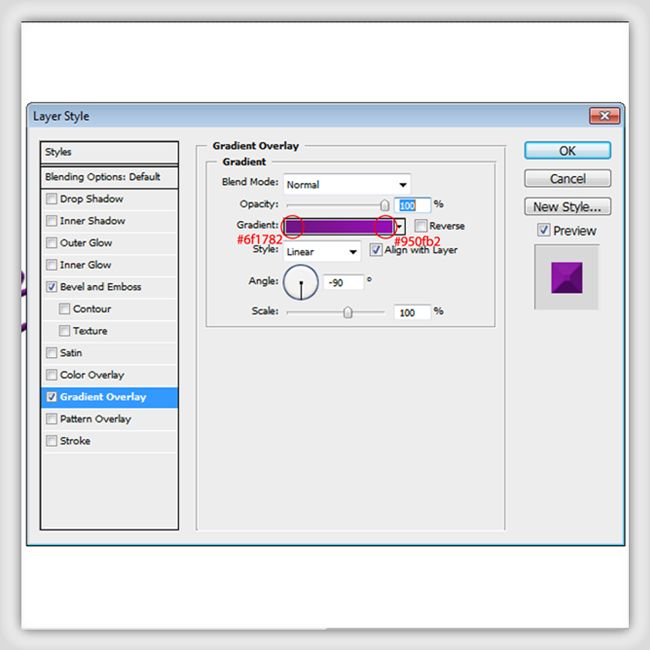
The layer styles for the ‘Edge’ text are shown below.
The colors used to apply the gradients are ‘#6f1782’ and ‘#950fb2’
STEP 6
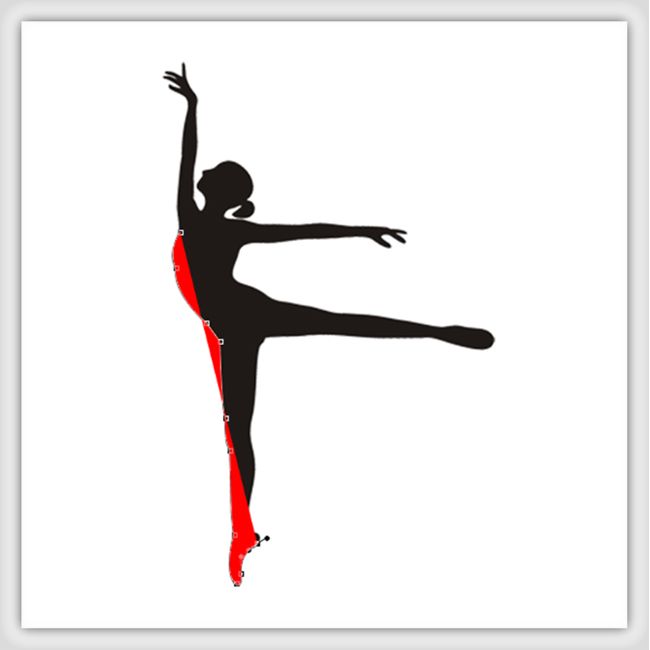
Now we are going to create the dancing silhouette. If anyone is not capable of drawing a silhouette image using by your own, you can find an image and trace that image using the pen tool. Make sure you have selected the ‘fill’ command in the option bar.
STEP 7
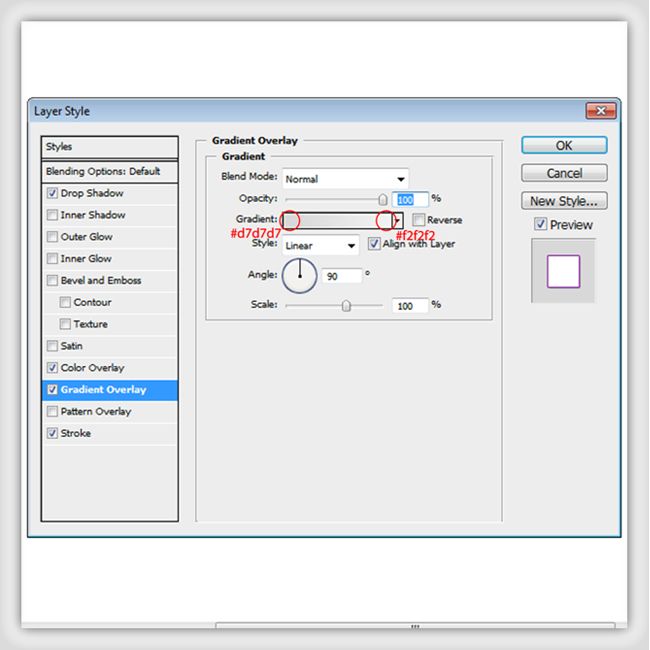
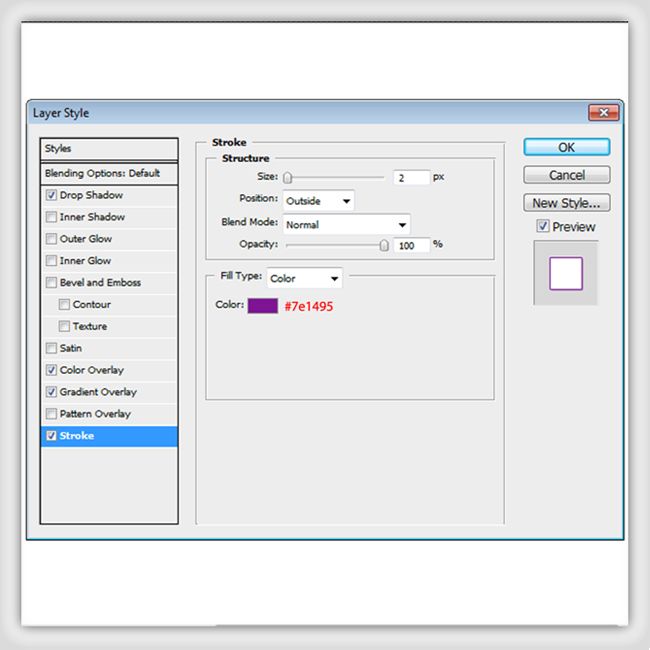
After drawing the silhouette we can apply a glowing type effects using layer styles. Go to the layer styles pallet and apply the following styles to the picture.
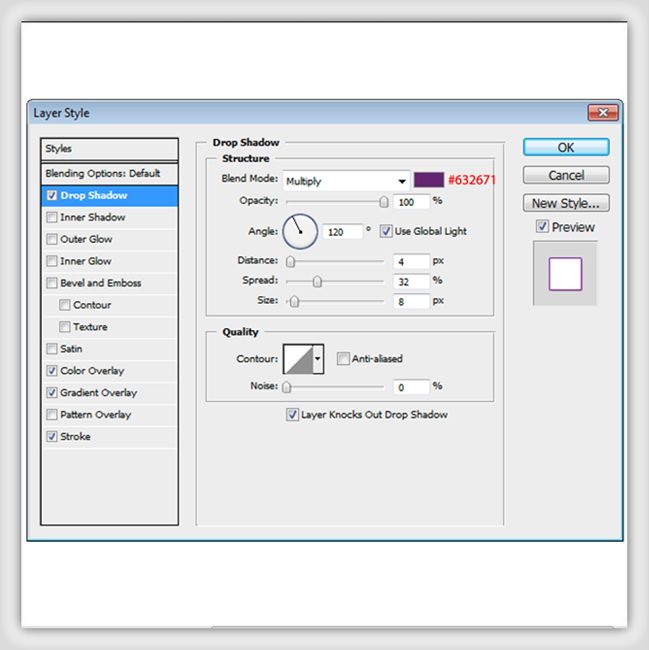
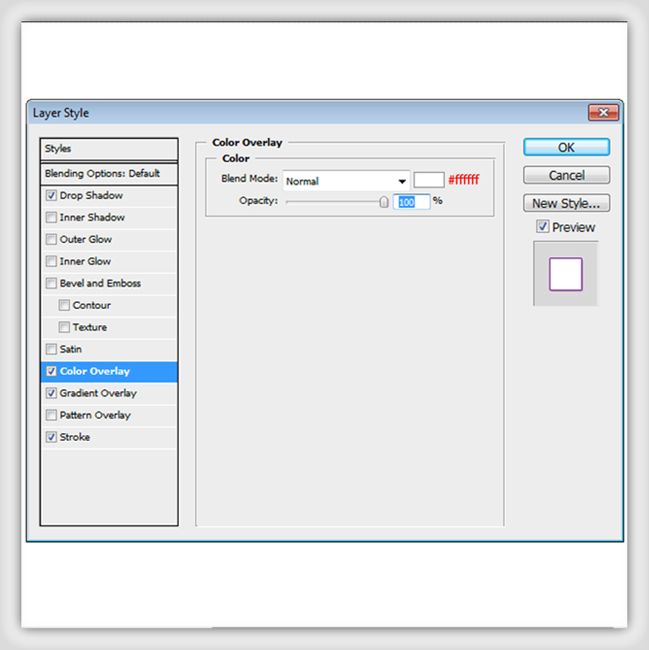
The colors used to apply the gradients are ‘#d7d7d7’ and ‘#f2f2f2’
STEP 8
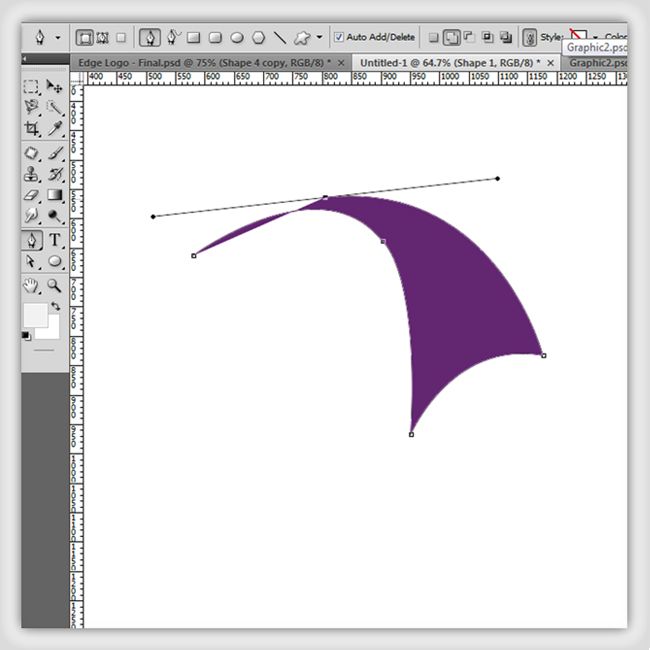
Now it’s time to add little bit details to the logo. We are now going to create the cloth type objects behind the silhouette. And draw a shape like shown below using the pen tool. The color is not actually matters as we are going to add layer styles.
STEP 9
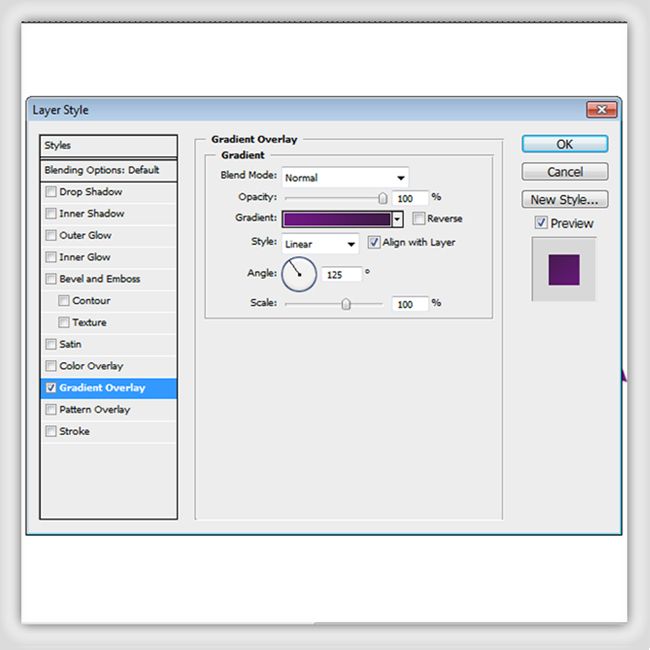
Go to layer style pallet and apply following effects to the drawn shape ( let’s call it as shape1 ). The gradient colors are ‘#6f1782’ and ‘#3e1c46’.
STEP 10
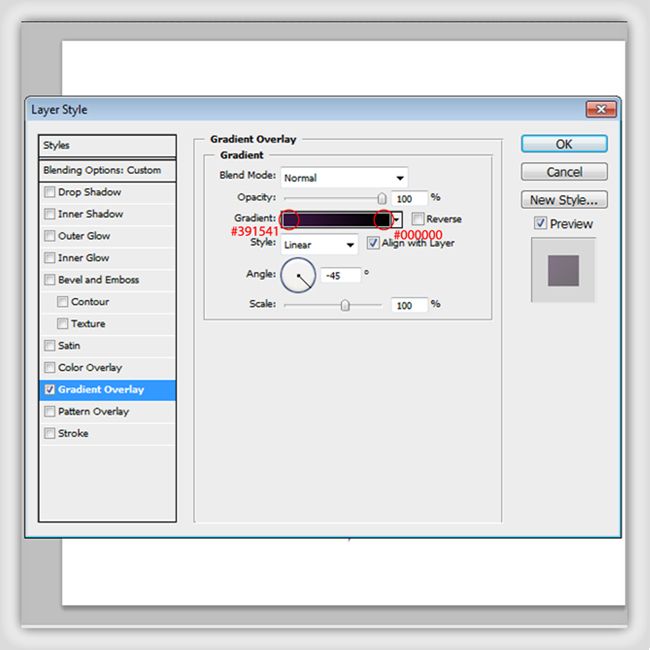
To add more details into the above shape, draw a shape (let’s call this shape as shape2) as shown below above the shape1. Go to the layer styles pallet and apply a gradient effect with ’#391541’ and ‘#000000’ colors. Then come back to the layer pallet and decrease the opacity to 50%.
The layer style for the shape2 is shown below
STEP 11
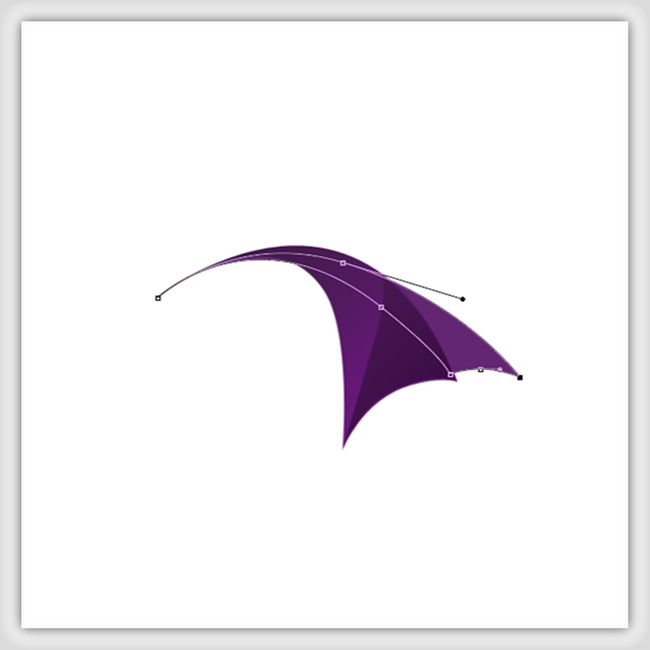
We have to create some more shapes as follows. This shape is named as shape3. All the shapes are draw using pen tool. Then keep the shape behind the shape1 and shape 2. ( Take the shape3 layer below the other 2 layers in the layer pallet ).
STEP 12
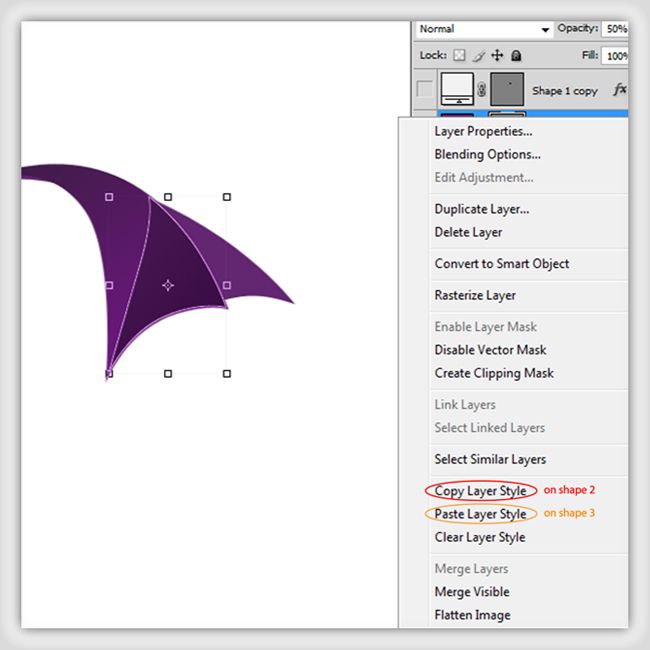
We are going to introduce a way that you can easily copy a layer style into another layer. Select the shape2 layer -> right click on the layer -> select ‘copy layer styles’. Then select the shape3 layer -> right click on the layer -> click ‘paste layer styles’. But make sure the opacity of the shape3 layer is 100%.
STEP 13
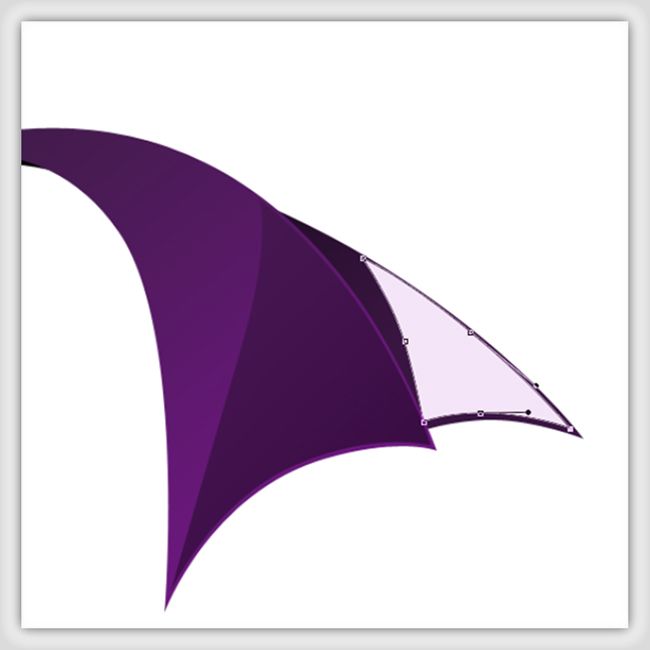
As we have done earlier this time also we are going to add some details into the shape3. Create a shape4 as shown below above the shape 3. Copy the layer styles in shape2 into the shape4 and decrease the opacity to 50%.
STEP 14
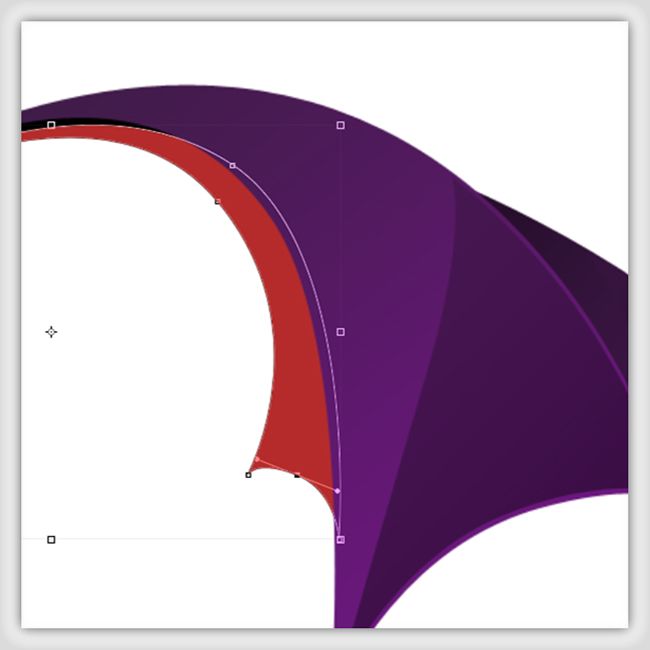
Create a shape5 as shown below above the shape 1. Paste the layer styles of shape2 into the drawn shape. And then go to the layer pallet -> gradient overlay -> change the angle to 0 0.
STEP 15
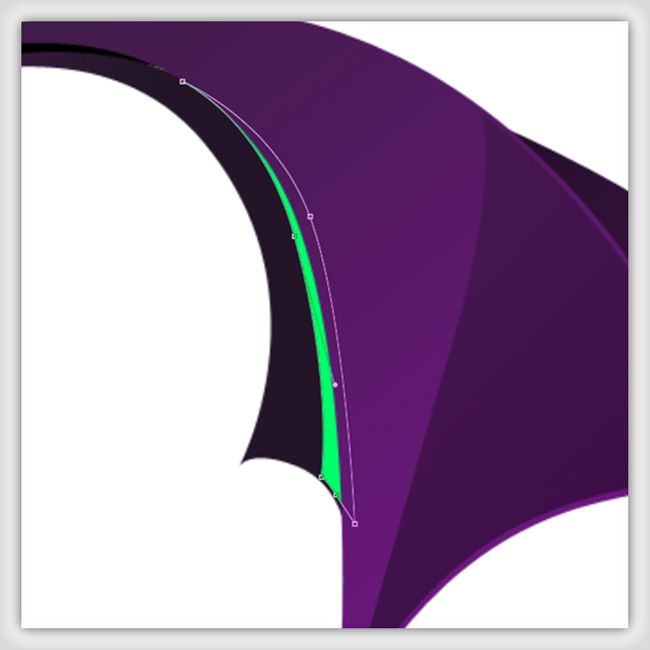
To add details into the shape5, create the following shape above the shape5. Copy the layer styles in shape2 and paste on the drawn shape (shape6). And change the opacity into 80%.
STEP 16
Arrange all the pieces as shown below. And if you like you can group all these objects as a one. Select all the layers -> press ‘Ctrl+g’. Rename it as ‘logo’.

STEP 17
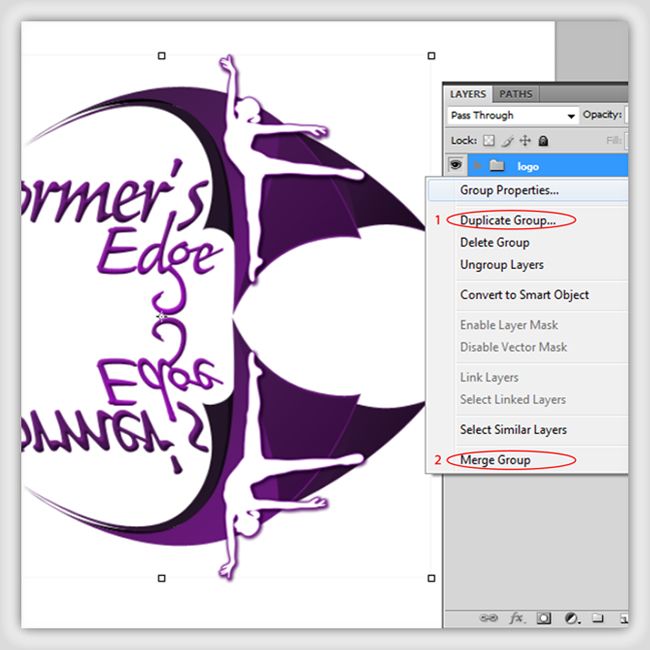
Arrange all the pieces as shown below. And now we are going to add a reflection of the logo.
1) Take a copy of the ‘logo’ group. Go to layer pallet -> right click on the ‘logo’ group -> duplicate group -> give the group name as ‘reflection’ -> ok.
2) To make the reflection group as a one layer, right click on the ‘reflection’ group -> merge group.
STEP 18
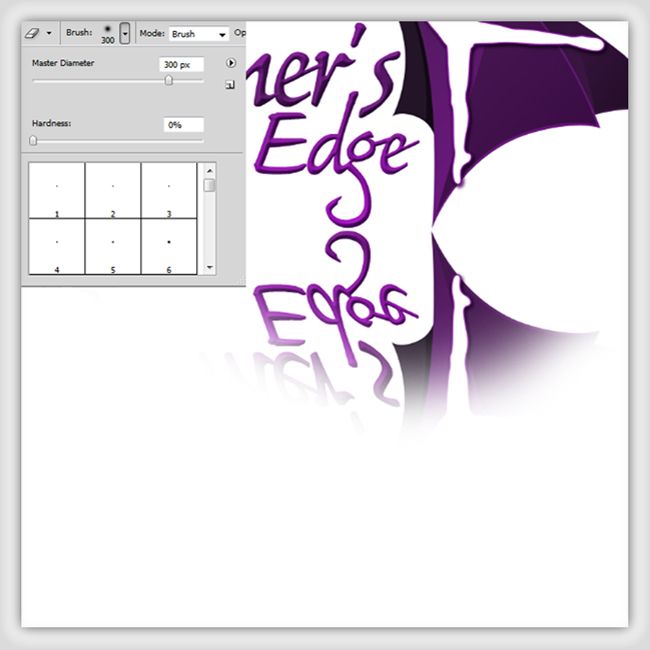
Take the eraser tool with master diameter = 300px, hardness = 0%. Then erase the bottom part of the merged reflection group.
STEP 19
We are going to see the end of this tutorial. To make the presentation much interesting, select all the layers in the layers pallet and group the layers -> duplicate the group -> give the group name as black & white -> merge the group. And decrease the size of the layer and place it in the bottom right corner.
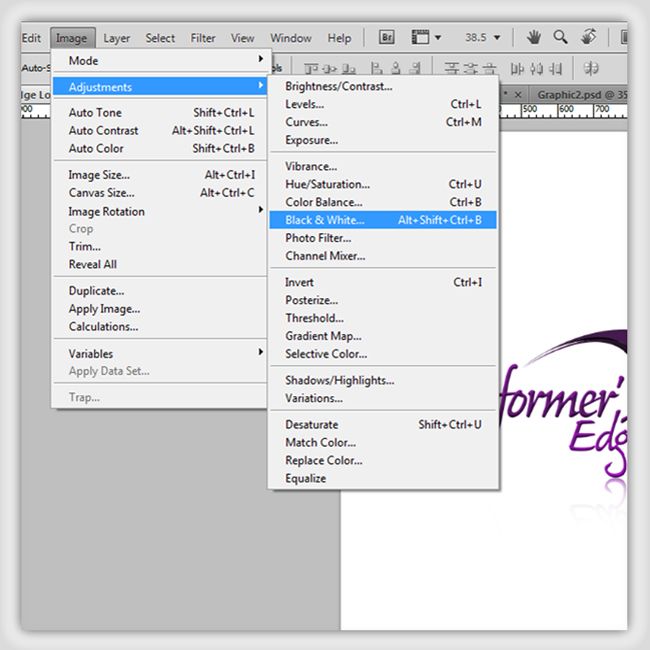
To present the logo in black and white select the ‘black & white’ layer -> Image -> adjustments -> Black and White -> Ok.
That’s it !
I hope this tutorial sheds some light on the possibilities of creating a logo with layers styles & reflections. And this is the final outcome of our tutorial. Hope you’ve enjoyed it!



art works